
TrackTune Maps and GPS Traces
A course map puts the car’s GPS marker over a fixed picture of a place. Choose the picture in the Meters dashboard builder, then install a package with that dashboard. The picture travels with the package, so the car does not need an internet connection to display it.
Course maps are part of TrackTune, which comes with every ScreenTune license. The car needs ScreenTune 1.2.0 or later; get started with TrackTune covers the installation.
Choose the place and its picture
Section titled “Choose the place and its picture”- Open a custom dashboard in My ScreenTune. Start from the Course Map template, or select the Map widget in your design.
- Open Look. Under Framing, choose Course.
- Under Course, select Choose place…, or Change place… for an existing selection.
- Pick a track from the quick picks, or enter a track, kart track or address and select Search. Choose a result to load its preview.
- Select Map for a drawn map or Aerial for imagery with the circuit drawn over it.
- Drag the map to pan. Scroll, pinch, double-click, or use Zoom in and Zoom out to change the scale. Adjust frame lets you move the white selection box; its corner handles resize it while keeping the widget’s shape. Focus the map and use arrow keys to pan, or focus the box to move it with arrows and resize it with + and −.
- Under Position, enter latitude and longitude, use My location, or Reset view.
- With Map selected, customize the background, land, water, roads, buildings, and track colors. Toggle layers and adjust Line weight. These settings are saved with the map.
- Check Dashboard image at its actual pixel size. Preview final image renders the encoded picture and shows its file size. Select Use this area when ready.
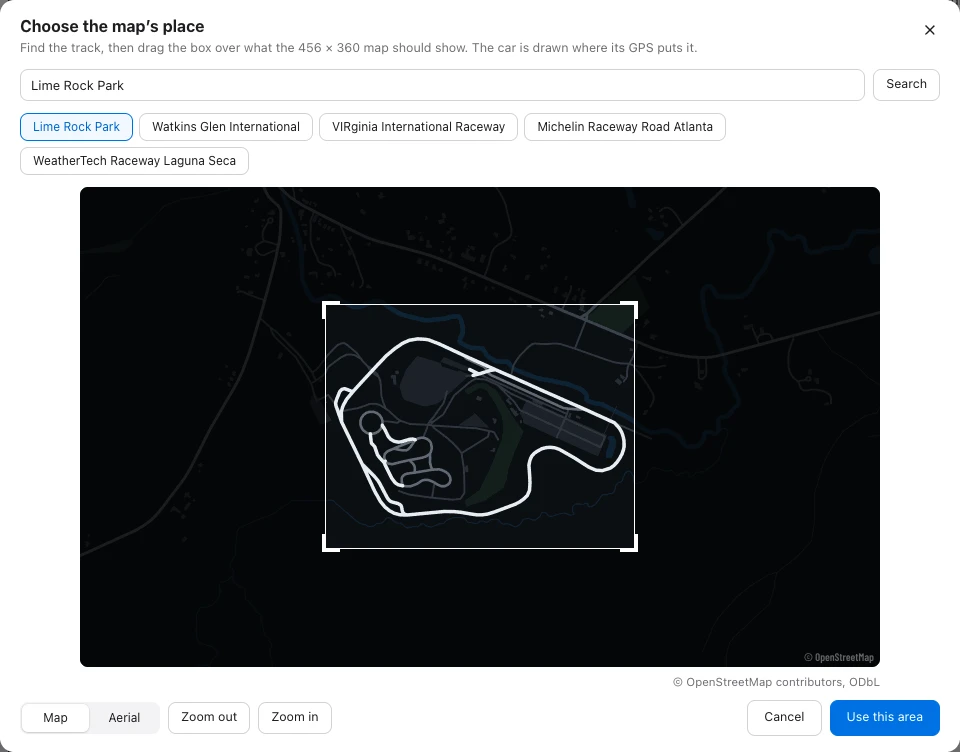
Local browser example with an entitled TrackTune fixture and retained public map data.
Map uses OpenStreetMap data. Aerial uses USDA NAIP imagery, available in the lower 48 US states only, and may be unavailable for a particular area. If imagery is unavailable, try Map. If a search or picture request fails, try again later or choose another place. See map credits and licenses.
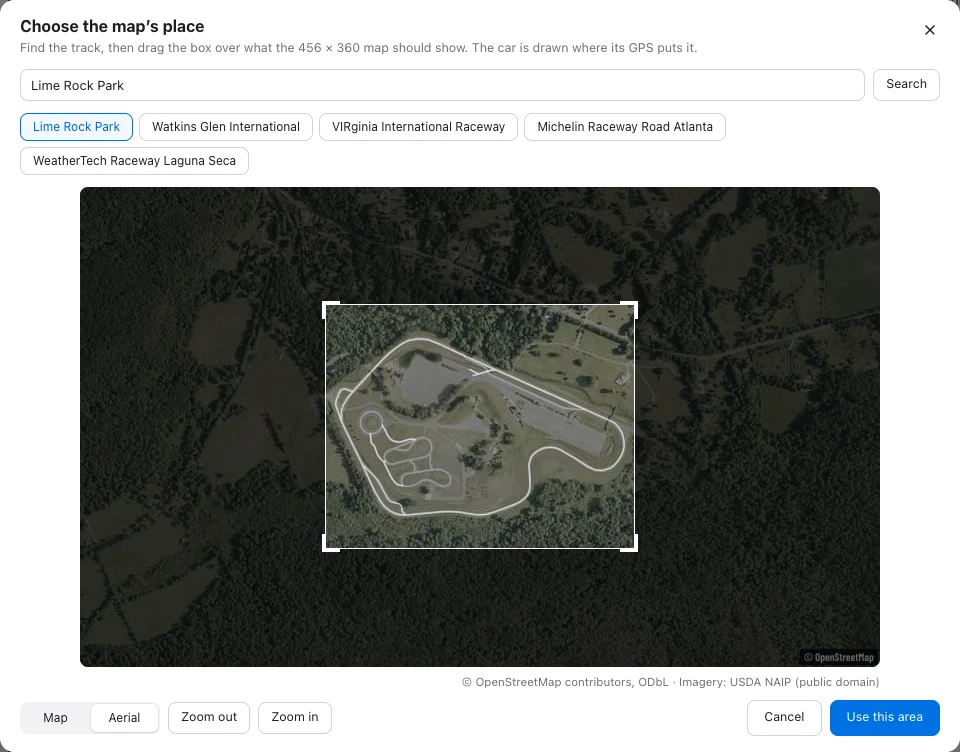
The local example uses retained USDA NAIP imagery rendered with the current map code.
The Course section’s Look control also offers None, which keeps the chosen fixed area without its picture. Before you choose an area, Course framing fits the drive instead. The car runs one Map widget per dashboard; use its framing control to change how it behaves.
Check the frame, then send the dashboard
Section titled “Check the frame, then send the dashboard”The map stays north up at the chosen center and scale. Leave enough space around the circuit for the marker and trace. If you resize the widget, check its frame again; Checks can ask you to choose the area again when it covers too much ground at that size.
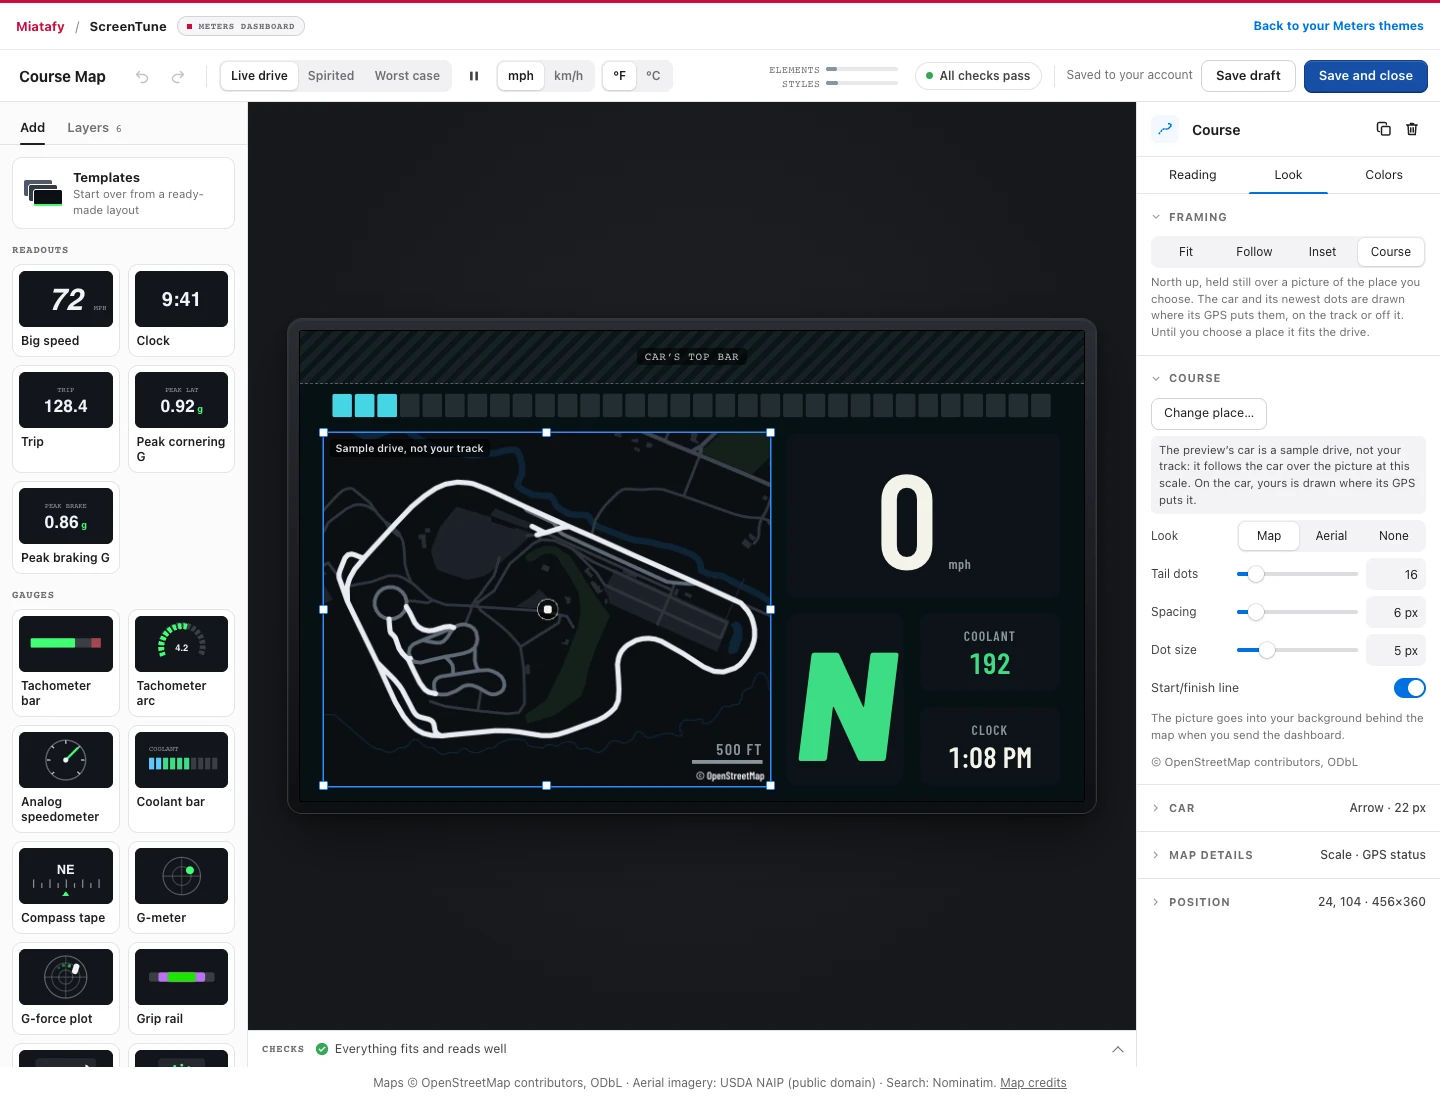
Local browser example. The committed Lime Rock map is real map data; the moving car uses the builder’s sample drive. This is not an in-car capture or a lap of Lime Rock.
The builder’s moving preview is a demonstration, not a recorded lap of the chosen circuit. The car draws its marker where GPS puts it, including off the pictured track; it does not snap the position to the circuit. GPS quality still limits the trace.
Save the design, tick it onto the theme list, then send the themes to the car. A saved map selection reaches the car only when you install that package. TrackTune widgets need TrackTune on the car, which means ScreenTune 1.2.0 or later.
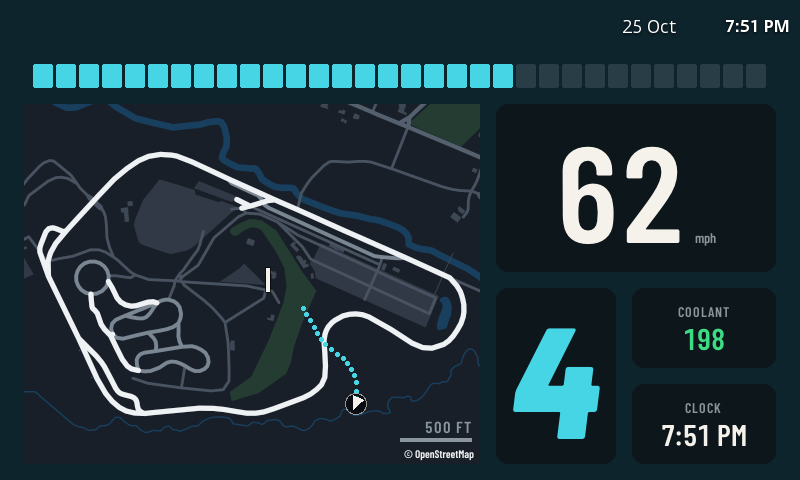
Physical 800 × 480 CMU capture with synthetic demo telemetry. The loop is centered on the picture for the demonstration; it is not a recorded lap of Lime Rock. This capture checks the rendering, not GPS or lap-timing accuracy.
The map uses a privately hosted Protomaps dataset built from OpenStreetMap. Roads, buildings, water, and race circuits load together. Check the preview before saving; source data can still be incomplete or out of date.
Choose a trace instead of a fixed place
Section titled “Choose a trace instead of a fixed place”Use Fit, Follow, or Inset without a course picture. The lap timer finds its own start/finish line unless you place a manual line in the course editor.
Map controls
Section titled “Map controls”The Map widget draws your drive as a GPS trace, north up. Fixes less accurate than 15 m move the car marker but not the trace.
On Reading, with the arrow marker, Arrow points at the Course (direction of travel) or the Heading (where the car points).
On Look:
- Framing: Fit zooms out as the drive grows and settles once you lap the same roads. Follow holds a fixed scale, set by Distance across (100 m to 5 km), and moves when the car nears an edge. Inset holds the best lap still once its reference trace arrives. Course holds a chosen place still, with an optional map or aerial picture.
- Trace: Shows Recent, the newest dots, or Whole drive, which keeps the start: when the dots run out, every other one goes and the rest spread out. Set the number of Dots (4–120), their Spacing, and Dot size. Each dot costs 3 screen elements.
- Car: Marker Arrow, Dot, or None, and its Size.
- Map details: Grid and Grid spacing, Scale bar, and GPS status.
With Inset, Track sets the outline’s Dots, Spacing, Dot size, live Tail (0–24 dots), Sector colours, and Start/finish line. Before a best lap is available, it fits the drive. A new best lap redraws the outline. Each sector keeps its faster or slower color after you finish it, compared with your best for that sector, until you finish it again. The colors are Track, Faster sector, Slower sector, Car, tail & line, and Grid & scale.
With Course, select Choose place…, or Change place…, to search for a track or address and frame the area. Look offers Map, Aerial, or None; aerial imagery is available in the lower 48 US states. Tail dots, Spacing, Dot size, and Start/finish line control the live overlay. Colors are Tail, Car & line, and Scale. The picture becomes part of the dashboard background when you send it to the car. Use the place picker to choose and frame the area.
The Course preview uses a sample drive at the chosen scale. It does not simulate driving your chosen circuit. On the car, the marker follows its GPS position, including when it is off the track. Until a place is chosen, Course fits the drive.
With Fit or Follow, colors are Trace, Car, and Grid & scale.
The trace joins GPS fixes. At 100 km/h, fixes are about 28 m apart at 1 Hz, 14 m at 2 Hz, and 2.8 m at 10 Hz, so lower rates can cut across corners. GPS stays at the factory 1 Hz unless the optional 10 Hz GPS setting is on (Change features in My ScreenTune). With it on, the car targets about 10 Hz on supported u-blox receivers and 2 Hz on STA8088 receivers when Navigation is not running, including when it is disabled. While Navigation is running, the receiver runs at 1 Hz. Receiver coverage and the rate actually received vary by car. A faster rate does not establish position or timing accuracy.
Place a start/finish line
Section titled “Place a start/finish line”Open Start / finish, choose Place start/finish line, and click the map where the line should cross the course. Drag its center to adjust it; arrow keys move it one meter, or ten meters with Shift.
Set Line width to span the driving surface. Crossing direction is the direction you drive across the line: 0° north, 90° east, 180° south, 270° west. The yellow arrow shows that direction; Reverse direction flips it. The line is perpendicular to the arrow.
Choose Use this area to save the map and line together. Reopening the map keeps the line in its geographic position, even after panning or changing the map’s colors. Use automatic detection removes your manual line and lets TrackTune discover one while you drive.
Set the width between 5 and 200 meters. The first forward crossing inside that width starts timing; reverse crossings and crossings outside it do not count. Save and send the updated dashboard to the car to apply the line. Changing the active timing line clears lap history and the best-lap reference.
If a recording-stick line activates, it takes priority over this dashboard line for the rest of the recording, and the map draws the active stick line. When recording ends, the dashboard’s latest manual or automatic choice returns. The Start/finish line display toggle controls whether the gate is drawn; hiding it does not disable lap timing.